Soldering Basics and SMD Soldering on PCB Using Hot Air Gun

What is Soldering ?
Things required for soldering
- Soldering iron
- Soldering Iron Stand
- Tweezers
- Hot Air gun required for SMD soldering
- Desoldering pump or Desolder Sucker
Flux (Soldering paste)
What are the chemicals used in the flux ?
- Sodium Carbonate
- Potash
- Borax
- Lead Sulphide
- Separate the metals
- solder the metas
Solder (Tin Lead)
- Melting temperature is so lower than other metals
- Low resistive material (When you are soldering the conduct point in a circuit it should be a important consideration)
- Also Hardness and Density of these element.
Soldering safety
Workers can be exposed to lead during soldering. If handled incorrectly, lead can pose chronic health effects, such as reproductive problems, digestive problems, memory and concentration problems, and muscle and joint pain.Potential exposure routes:
- Ingestion
- Inhalation
Read risk assessments and chemical safety information before starting work. These should be readily accessible from the soldering station.
Make sure you know what is in your solder, it is not always apparent on the reel label. If in doubt, ask.
Soldering Iron
- Never touch the element of the soldering iron....400°C!
- Hold wires to be heated with tweezers or clamps.
- Keep the cleaning sponge wet during use.
- Always return the soldering iron to its stand when not in use. Never put it down on the workbench.
- Turn unit off and unplug when not in use.
Solder, flux and cleaners
- Wear eye protection (Safety glasses). Solder can “spit”.
- Use rosin-free and lead-free solders wherever possible.
- Keep cleaning solvents in dispensing bottles.
- Always wash your hands with soap and water after soldering.
- Protective clothing (Prevent burns from splashes or hot solder Eg : Long sleeve shirts, pants and gloves)
Now lets see how to solder and desolder using Soldering Iron
Before getting started, read the instructions as well as the health and safety warnings that come with all of your equipment to ensure you're using it correctly. When soldering, wear safety glasses and keep all hair, loose clothing and jewellery secured and out of the way of your tools. You may also want to wear safety gloves.Be sure that you are working in a well-ventilated area or use a fume extraction device. The fumes from flux are toxic. If the solder you are using contains lead, wash your hands after you're done working with it.
Soldering Process
- Cleaning and Tinning

For your soldering iron tip to work correctly, it needs to be clean and tinned. Any contaminants or oxidation will decrease the efficiency with which it conducts heat, making your job harder and reducing the quality of your solder joints.
Before you start soldering, clean the tip of your iron by rubbing it against your cleaning pad. If your tip is badly oxidized, you may need to apply a tip reactivator. After cleaning or reactivating it, it should appear shiny rather than dull.
Tinning the tip of your iron involves coating it with a layer of solder. This practice protects the tip from oxidation and improves its ability to conduct heat. Tin the tip immediately before you begin soldering.
In addition to cleaning and tinning the tip of your iron before each soldering session, you should also do so after every two or three joints you solder and at the end of each soldering project. This will extend the life of your soldering iron tips and improve the quality of your soldering joints.
Once you've completed the above steps, you're ready to solder your components together. The techniques you'll use will vary from project to project, but the basic step-by-step instructions are as follows:
- First, determine the right temperature for your project. Which temperature to use depends on the materials you're joining and the kind of solder you're using. As a general rule of thumb, the best temperature to use is the one that's as low as possible while still being high enough to get the job done. In other words, if the temperature needed to do the job is 370 degrees or above, then set the temperature to exactly 370. This will help extend the life of your tools and avoid damaging any electronic components.
Normal soldering irons are fixed temperatures but there are high end soldering equipments with adjustable temperature.
- Now turn on the Soldering iron keep it on the soldering iron stand like this
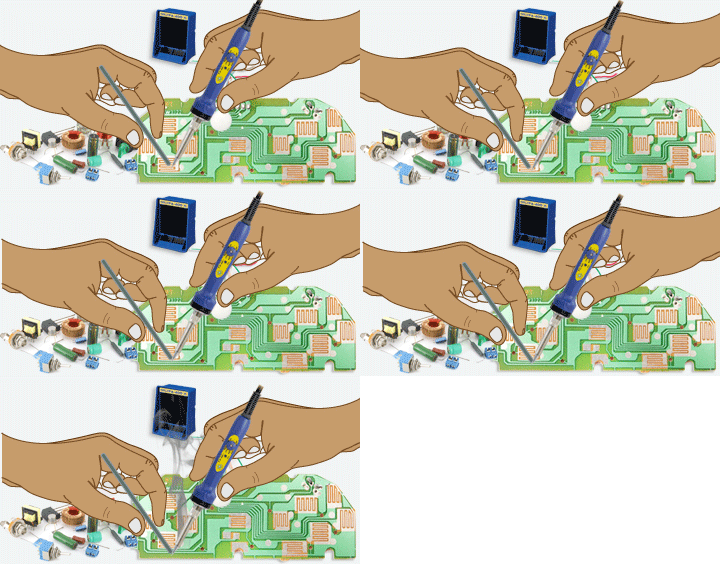
- Once your iron is heated to the appropriate temperature, pick up the iron by the handle in one hand and hold a piece of solder in the other hand.
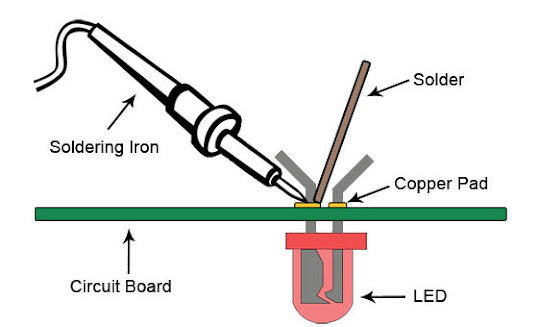
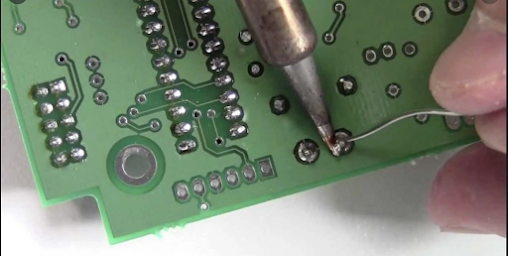
- Hold the hot iron to the place where the two metal components will meet for about a second to heat them up. You want to heat the metal parts, not the solder itself.
- Then, touch the solder to the heated components. As the solder melts, it will flow into the gaps it needs to fill. Continue to feed in solder until a sufficient amount is melted. While you need enough to form a solid connection, you don't want to have too much solder either. The right amount will vary from project to project. This typically won't take more than a few seconds.
- Allow the solder to cool. You don't need to take any action to cause it to cool. It will do so on its own and shouldn't take longer than a few more seconds.
- Check the soldering joint for quality. A good connection will appear smooth, uniform and shiny. Make sure that aren't any problematic gaps between the components or globs of excess solder.
Desoldering
If you made a mistake in your soldering, don't worry. You can undo and fix any problem areas relatively easily. If the problem isn't excess solder, you may be able to resolder over the first joint with new solder.A more thorough method of correcting a soldering mistake is to reheat the solder you applied and then to use a tool such as a "solder sucker,"
SMD soldering Using Hot Air Gun
First let's see few basic things about the Soldering stations you can refer the image of a soldering station above this have Hot Air Gun + Soldering Iron both. You can use this station for 2 in 1 purpose.1st switch is to turn on the Soldering iron. 2nd switch is for turning on the Hot Air Gun (Hot Air Gun pump). You can hear a hum noise when the Hot air gun pump is turned on.
Also you can see 2 knobs 1st one is for setting the hot gun temperature and the second one is for setting the air pressure.
SMD Soldering and Desoldering
Now let's see how to solder and desolder a SMD Component
- First hold your PCD in a PCB holder clamp like this. This will hold your PCB more steady while soldering.
- Now let's turn on the Hot Air and and set the temperature. You will hear a hum noise when the hot air pump is started.
- Now let's set the temperature. I'm setting it to 380 C but adjusting the temperature knob also double check the temperature value by looking at the display in the work station. You can choose your temperature based on your requirement. If you set high temperature it may cause to damage your PCB and Electronic component.
Now let's wait until this heat LED light on. When the LED is turned on you are ready to go with Soldering.
- Now let's set the air pressure. I'm going to set it into 5.
If you set the air pressure to a higher value it may displace the Electronic component from the placed position while soldering. You you can determine this based on your component size and weight.
- Now apply the flux to the PCB surface on soldering point like this.
- Hold the air gun for few seconds
- Flux will start to melt
- Clean the surface with a cotton and Contact Cleaner spray.
Spray this on the PCB board.
Cleaned PCB surface.
- Apply some lead on the surface by soldering iron and level the legs.
- Now let's apply Flux all legs of the IC for holding the IC on the PCB board while soldering.
- Adjust the IC with the tweezer and make sure all legs on the correct position
- Now hold the hot gun straight on top of the Component until the the Flux is melted and you see a silver colour on the legs.
- Now try pulling the component with the tweezer and make sure the component soldered firmly on the PCB.
- Now again apply the contact cleaner on the legs and surface to clean. Then wipe it with the cotton.
Desoldering Process
Hold with a tweezer and try to pull the component from the surface.
😀 Happy Soldering ...... Stay safe ......


👍👍👍👍👍👍👍
ReplyDelete